When you buy stock to resell - a pallet of laptops from a trade supplier, a batch of phones from a wholesaler - you only need a purchase order. Recycly creates the receiving job and the expected items for you, and the goods are scanned into stock when they arrive. There is no need to raise a separate inbound order or collection.
This article walks through the whole journey: creating the order, emailing it to the supplier, booking the goods in when they arrive, and paying for exactly what turned up.
1. Create the purchase order
Go to Inbound > Sales & Purchases > Purchase Orders and click New. Choose your supplier, then add a line for each type of item you are buying. There are three ways to fill in lines:
- Pick a SKU - the Asset Type, Manufacturer, Model, Grade and Unit Price fill in automatically, and everything stays editable. The SKU dropdown also shows how many of that SKU you already have in stock.
- Fill in the fields by hand - choose the Asset Type and set Manufacturer, Model, Grade and Item Specification as needed. The Description writes itself from the spec so the emailed order reads properly.
- Click Import Lines to load a whole order from a spreadsheet - download the blank template from the import window and put one row per line. Handy for long trade lists.
On a phone, tapping Add a product opens a popup carrying the same fields.
2. Email the order to your supplier
Click Email PO to Supplier. An email opens with the purchase order document attached, ready for you to review and send. After the first send the button becomes Re-Email PO to Supplier.
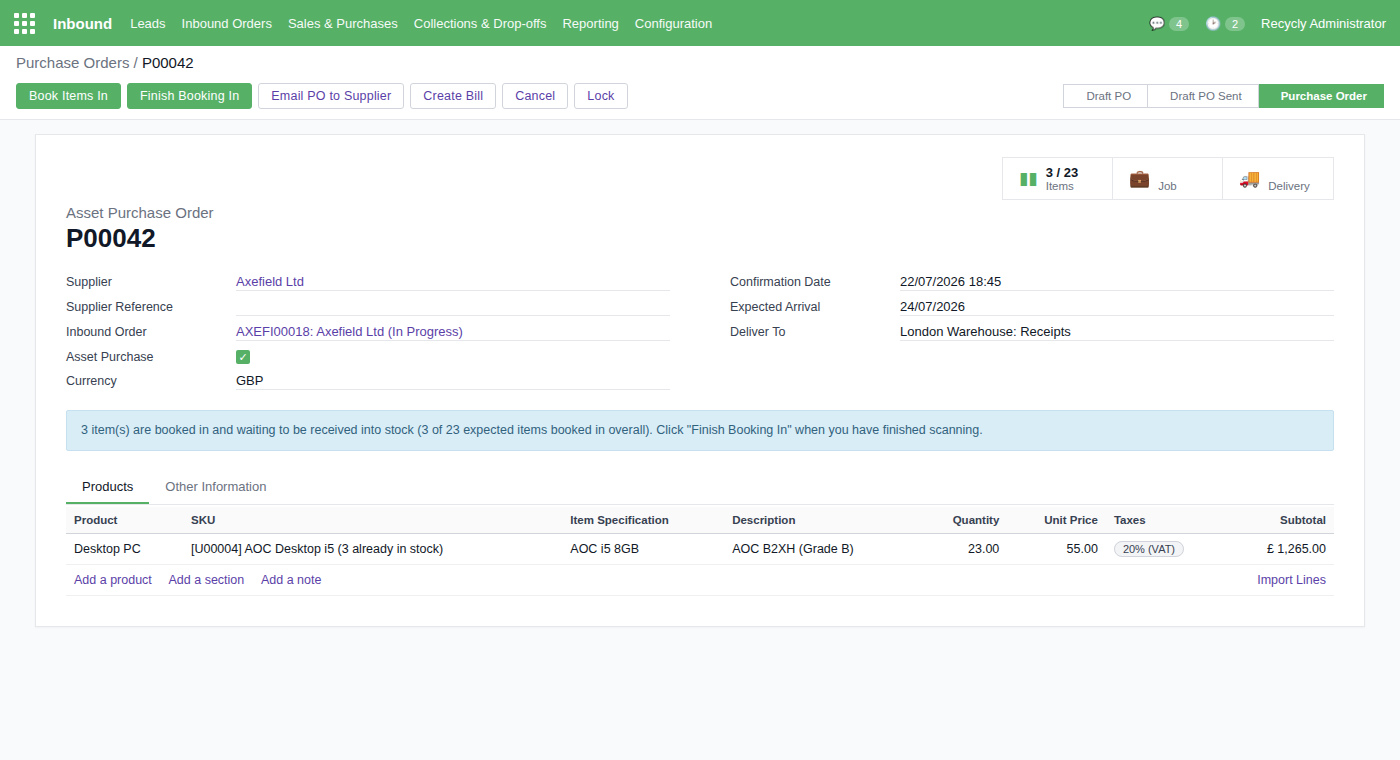
3. Confirm the order - Recycly does the paperwork
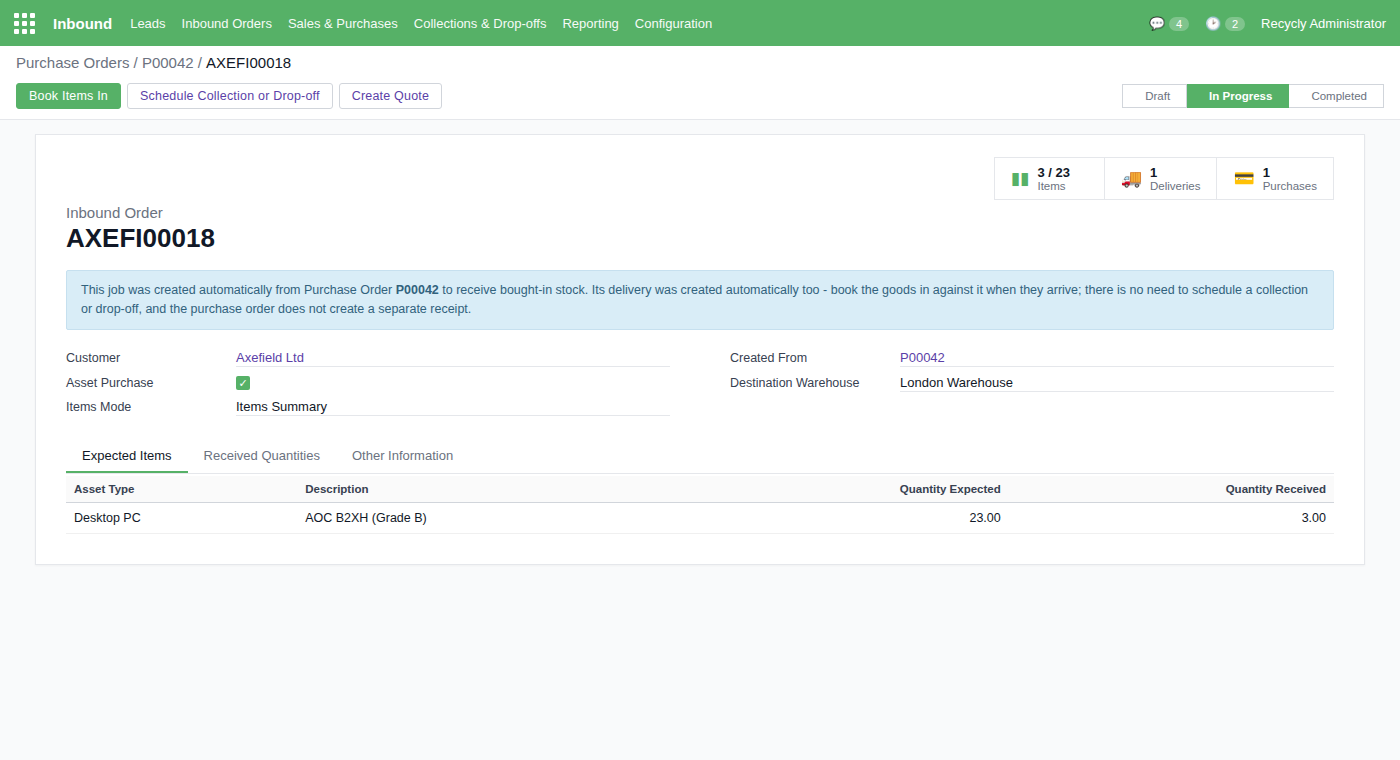
Click Confirm Order. Recycly instantly creates, and links to the order:
- a receiving job for the supplier, expecting exactly what is on your order lines
- the delivery the goods will be booked in against
The pale blue box on the order explains the next step at every stage, and three buttons appear at the top right: Items (the progress counter), Job and Delivery. Nothing needs to be scheduled - you are simply waiting for the goods.
4. Goods arrived - Book Items In
Click Book Items In on the purchase order. Scan or enter each item exactly as you would for any collection or drop-off: every item is created and labelled as it is scanned, so you can print labels as you go.
The Items counter on the order climbs as you scan (for example 3 / 23), and the blue box shows how many items are booked in and waiting. You can leave the scanning screen and carry on later - Book Items In resumes where you left off.
5. Finish Booking In - the items become stock
When you have finished scanning, click Finish Booking In on the purchase order. Every booked-in item moves into the warehouse and is available to sell straight away.
If fewer items arrived than expected, you are asked to confirm the quantities - confirm, and the missing items are simply dropped from the expectation. The order still shows the truth (for example 3 received of 23 ordered). The receiving job completes itself once its deliveries are dealt with.
6. If more items arrive later
Use Book Items In on the purchase order again - it creates a fresh delivery on the same job, and you book the late items in exactly the same way.
7. Where to find the items afterwards
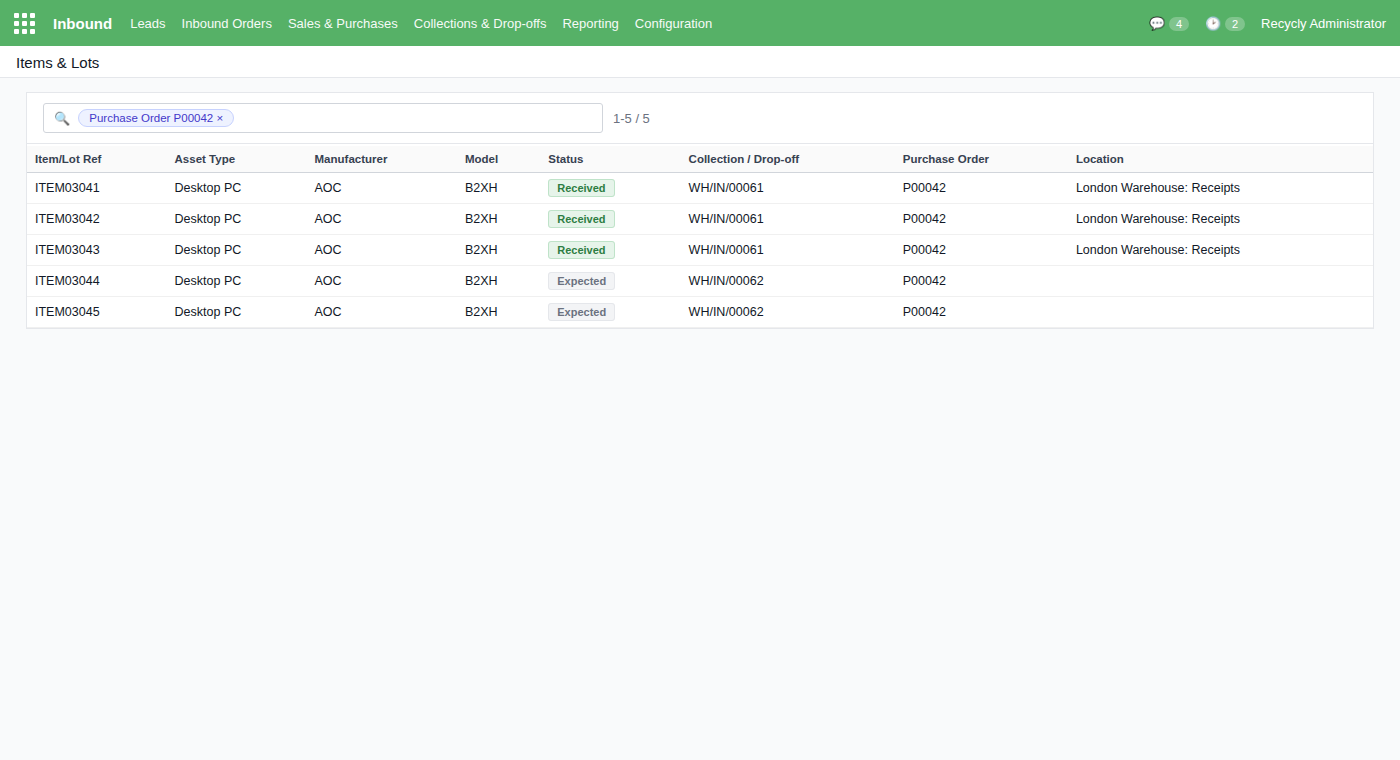
Every item created this way carries its Purchase Order, so you can always trace stock back to the order you bought it on:
- the Items & Lots list has an optional Purchase Order column
- each item's form links back to the order
- the order's Items button lists everything it generated
8. Billing - pay for what actually arrived
Click Create Bill on the purchase order. The draft bill covers the quantities you actually received, not what was promised - your protection against paying for goods that never turned up. What happens next depends on your accounting setup:
- QuickBooks: supplier bills are entered and paid in QuickBooks itself - there is no confirm step on the Recycly bill. Use the draft to check the supplier's invoice against what actually arrived; the note on the bill walks you through it.
- Xero: click Create Supplier Invoice in Xero to post the bill straight into Xero. Your administrator controls who has this permission.
Buying assets from a customer instead?
This article covers buying stock to resell from a supplier. If you are buying assets from a customer as part of their job (a buyback), link the Inbound Order field on the purchase order to that job instead - the items then arrive through the job's own collection, and none of the automatic creation above applies.